How to Assign IP Address to the Fast Ethernet in CISCO Router
CISCO Systems, Inc was founded in 1984 AD by a two member of Standford University Computer Support staff and now CISCO router is the most used routers in the world. CISCO router is very famous for the security and hence it is used in the high enterprise.
In this tutorial we will see how to assign the IP Address to the Fast Ethernet of the CISCO router. We will learn about the basic command to enter the Global configuration mode where we can write the programme for the router. So let’s get started.,
In this tutorial i will be using CISCO packet tracer as the simulation of all the commands. So before getting started i would like to write few things about the connection between the device.
What Cable will be used for what kinds of Device?
Straight- Through Copper: This wire is used to connect two different device for example router and switch or switch and PC.
Cross Over Cable: This cable is used for connecting two similar kinds of device for example, PC to PC, Router to Router and others
Console Cable: This cable is used for connecting the router or device which is used to be programmed with the PC, for example we use console cable to the Router Console Port and to the PC Rs232.
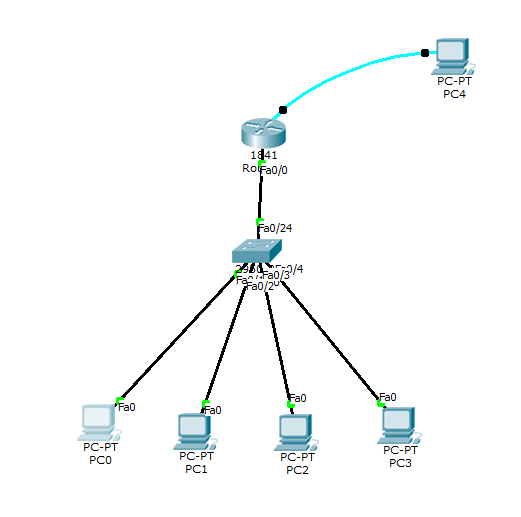
So you can see below. i have designed the simplest network consisting of PCs, Router, switch and all kinds of cable.

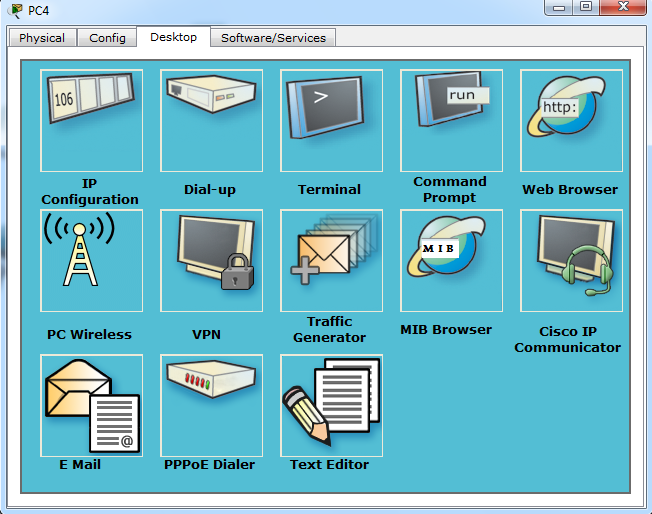
So now, double click on the PC4, in my case case PC4 is connected with router with the console cable.
Click on the desktop and then click on Terminal and then ok

Now you will see the Dialogue box, type no so that you can start programming.
Press Return/Enter Key to get started
Router>!This mode is called user execution Mode
Router>!To go to User privileged mode type Enable
Router>enable
Router#!This is User Privileged Mode
Router#!To go to Global configuration mode type 'Configure Terminal'
Router#configure terminal
Enter configuration commands, one per line. End with CNTL/Z.
Router(config)#!Now you are in Global Configuration mode
Router(config)#hostname jitutech
jitutech(config)#!To change the name of the Router use command 'Hostname' as above
jitutech(config)#interface fastEthernet 0/0
jitutech(config-if)#ip address 192.168.1.1 255.255.255.0
jitutech(config-if)#no shutdown
jitutech(config-if)#
%LINK-5-CHANGED: Interface FastEthernet0/0, changed state to up
jitutech(config-if)#do write
Building configuration... [OK]
jitutech(config-if)#exit
Now close the Window.
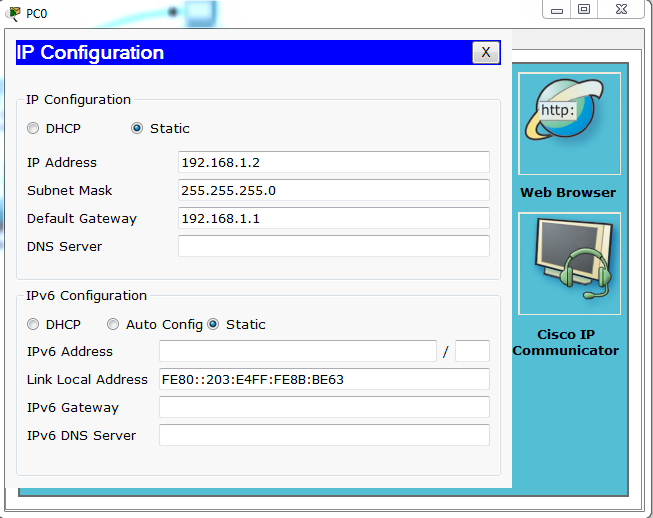
Now go to each PC and double click on it and click on IP Configuration, as we are using static IP method so we will have to go to each PC and assign the IP address Manually.

And finally we are done. If you did not understand the above method then check out our video tutorial which is will guide to step by step for assigning the IP Address to the Fasth Ethernet of Cisco Router.
If You still have any queries about assigning the IP address to the CISCO router then please comment below and we will assist you.
Thanks!


